When it comes to Closings, one of the most significant time-saving features is the ability to give schools the power to manage their own closings.
This streamlined approach alleviates the need for extensive communication with individual schools, reduces the risk of misinformation, and eliminates the task of updating potentially hundreds of schools manually.
Setting Up a School Login
Setting up a school login can be done when creating a school or at a later stage from the school listing screen. For the purpose of this tutorial, we’ll assume you’ve already created the school and want to enable school-managed logins.
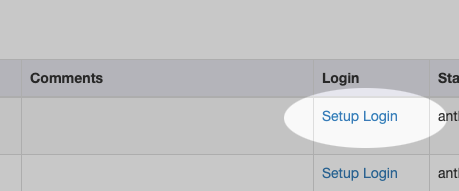
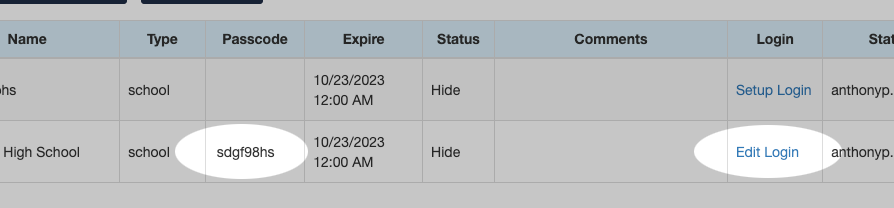
From the school listing screen, locate the school for which you want to establish a login. Click the Setup Login link associated with the selected school.
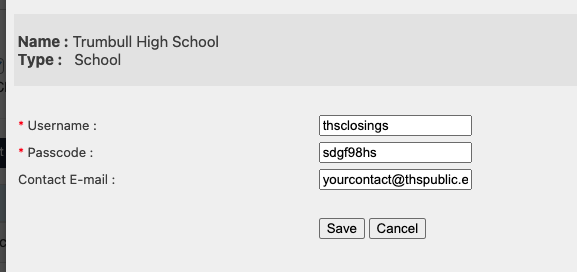
This will open a pop-up where you can configure their login.
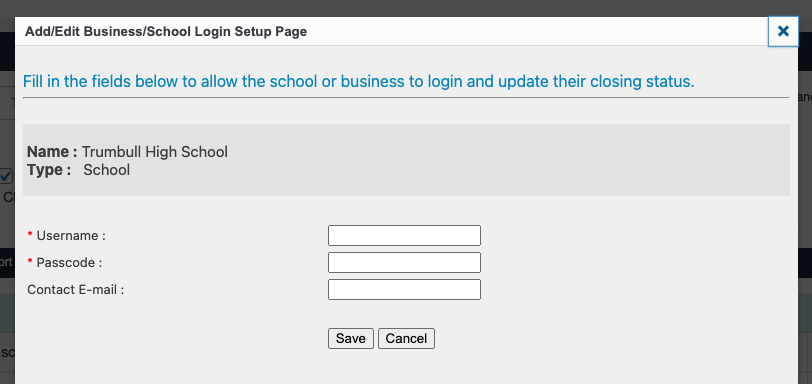
- The only required fields are a username and passcode. However, it’s advisable to include a contact email so you can send the user their login information and maintain contact in the future.
- Once you fill in the login information, click Save.
That’s it! The school is now set up to log in and update their own school’s status.
- You’ll know a school is prepared for login when the Setup Login link changes to Edit Login on the listing page, and the school’s passcode displays in the listing.
Supporting School Logins
Important Note: Even when a school is configured for login, your Closings Page also needs to be adjusted to support school logins. See the next section below.
Setting Your Closings Page to Allow School Logins
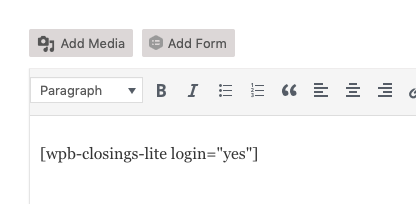
Your Closings Page typically consists of a School Closings shortcode on a page named “Closings.”
- To enable school logins on a closing page, just edit the page and add the “login=’yes'” parameter to the closings shortcode.
- The shortcode should look like this:
[wpb-closings-lite login="yes"]
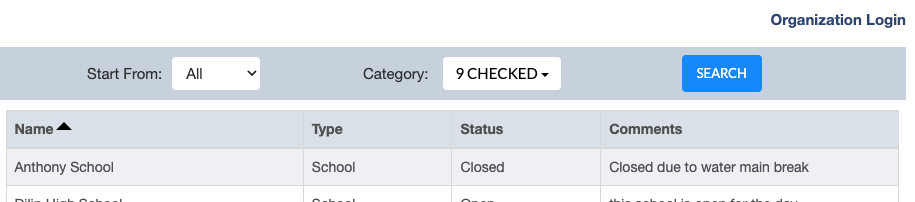
What A School Sees When they Login
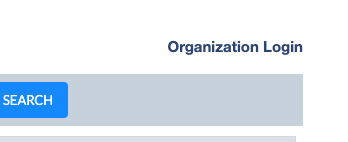
Once you’ve updated the shortcode to allow school logins, your closings page should display an Organization Login link above the closing list.
When schools click the login link, a popup will appear. They should enter the username and passcode you’ve established for them and then click Submit.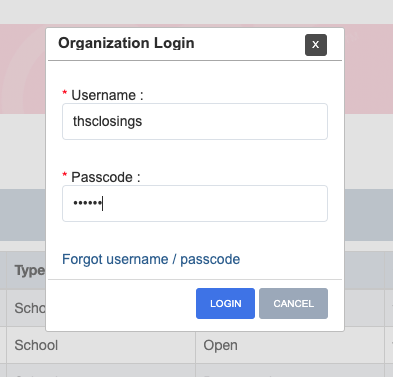
After a successful login, they can now adjust the fields for Expiration, Status, and Comments, similar to the options available in the Closings Admin.
Once they’ve filled out the required fields, they can click Save to submit the closing. 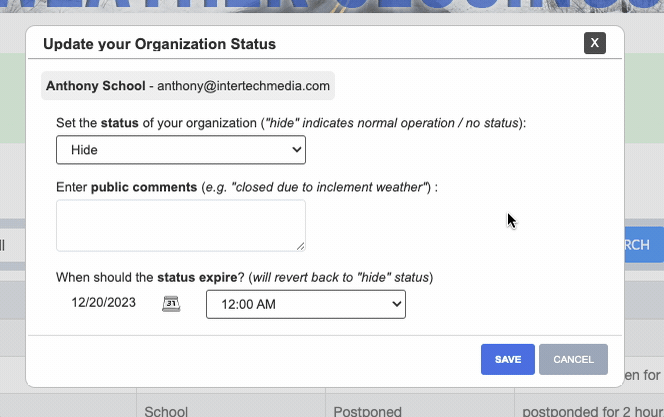
The Closings Page will be instantly updated for everyone with the information they’ve entered.