When the winter season blankets your region in snow, and you need to update school statuses quickly on your website, we’ve got you covered. Managing school closings is made easy and fast with our system.
Managing School Closings
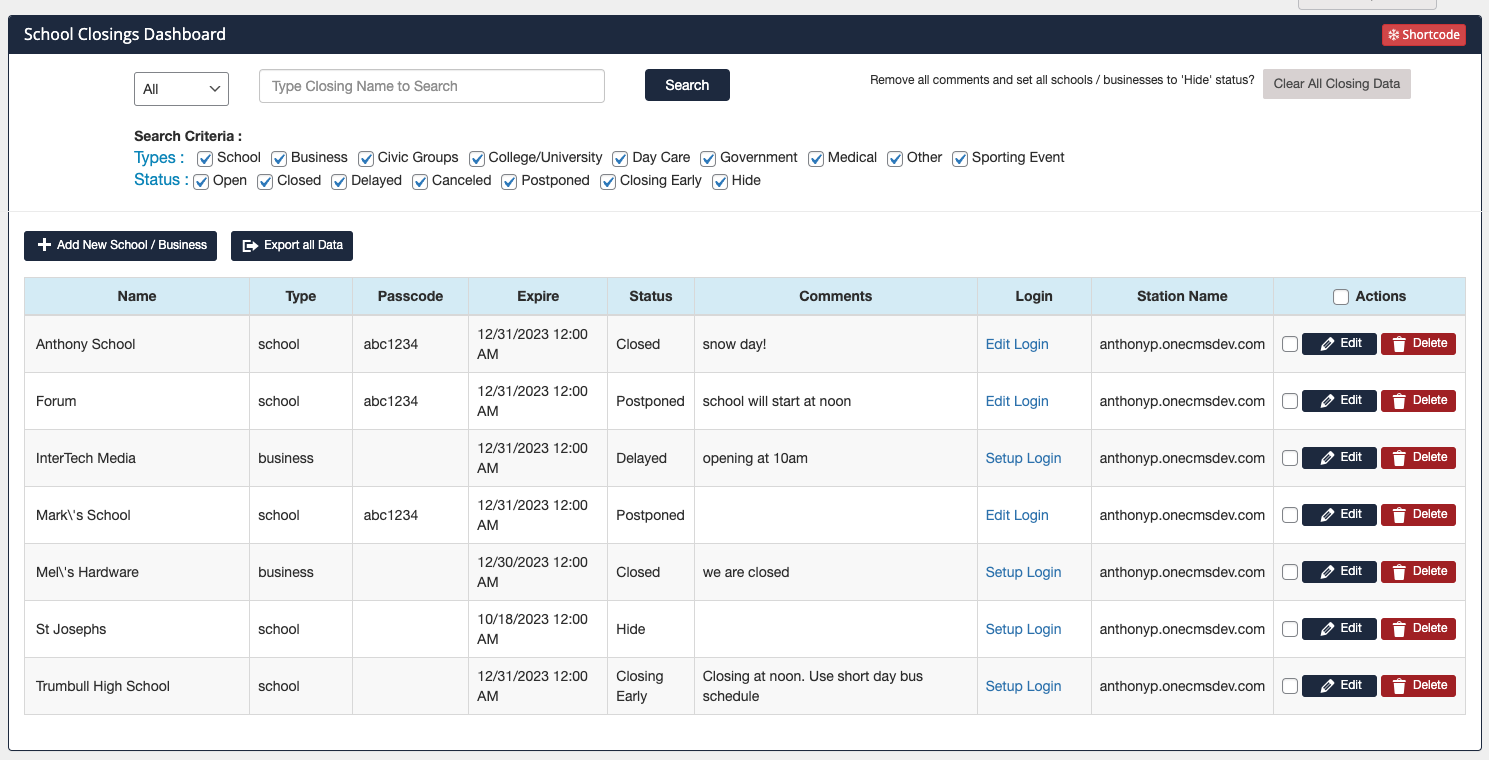
Access the All Closings screen to manage the status of your schools. You can find it under School Closings > All Closings. By default, your schools are listed alphabetically.
Filtering the School Listing:
You can filter the listing to find specific schools in a number of ways. Click the Search button for each new filter.
- Filter alphabetically using the dropdown at the top of the screen.
- Directly search for a school by its name in the search bar.
- Filter by Entity Type and current Status (e.g., show only schools marked as Closed).

Marking a School as Closed
Each school can be updated individually. Click the Edit button at the end of a school’s row to open up its fields for editing.

When marking a school as closed, you are primarily concerned with a few fields:
- Expire: This field specifies when the school’s status will be removed from the Closings Page on your website. If the date/time is in the past, it won’t show up as closed.
- Status: This field indicates the issue status of the school. You can choose from multiple statuses, a handful listed below:
- Open: The school is open but will still display on the Closings screen. This status is used less frequently.
- Closed: The school is closed.
- Delayed: The school has a delayed opening. Include a comment to inform your audience about the duration of the delay.
- Hide: This hides the school from the Closings Page on your website. It’s the default state when there are no issues for the school.
- Comments: This section provides additional information about the school’s status. For instance, if the status is set to delayed, you can enter “90-minute delay” in the comments.
 Once you’ve made the necessary changes to the school’s fields, click the Update button at the end of the school’s row.

- You can repeat these steps for all schools or businesses that need to appear on the closings page of your website.
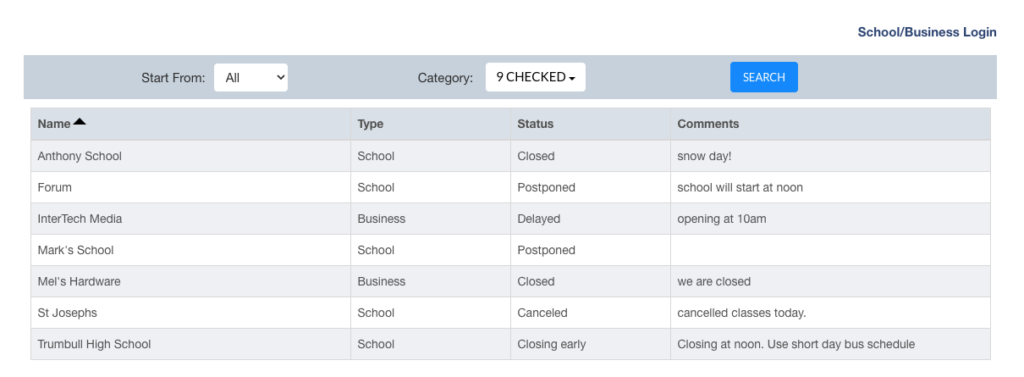
On your website’s Closings Page, your audience will see the same updated listing.
Clearing Closings
If you need to clear your school closings data after a busy closing day, you can do the following just by clicking the Clear All Closing Data button in the top right corner of the closings screen.
 Clicking the Clear All Closing Data button will:
- Clear all comments
- Set the status of all entities to Hide
- Set the expire date to 12:00 AM one day in the past
This action clears only the closing data for schools and does not delete any school information.
Bulk Updating Closings
- You can update all or only selected schools by clicking the action checkbox for at least one school, and the Bulk Action buttons will appear.
- Click the Bulk Edit button to open checkboxes that allow you to clear the comments, set a past expiry date, and change the status to “Hide” for the selected schools.
Once you have made your edits, click the Bulk Update button to save the changes.
