The Entries page is the hub for accessing and managing the data generated by form submissions.
Form Entries
To access the Entries page, click on the Entries link underneath the form you want to view the submissions for.

The Entry list page allows you to browse all entries generated by form submissions. From this screen you can browse, sort, and modify your entry with a variety of options.
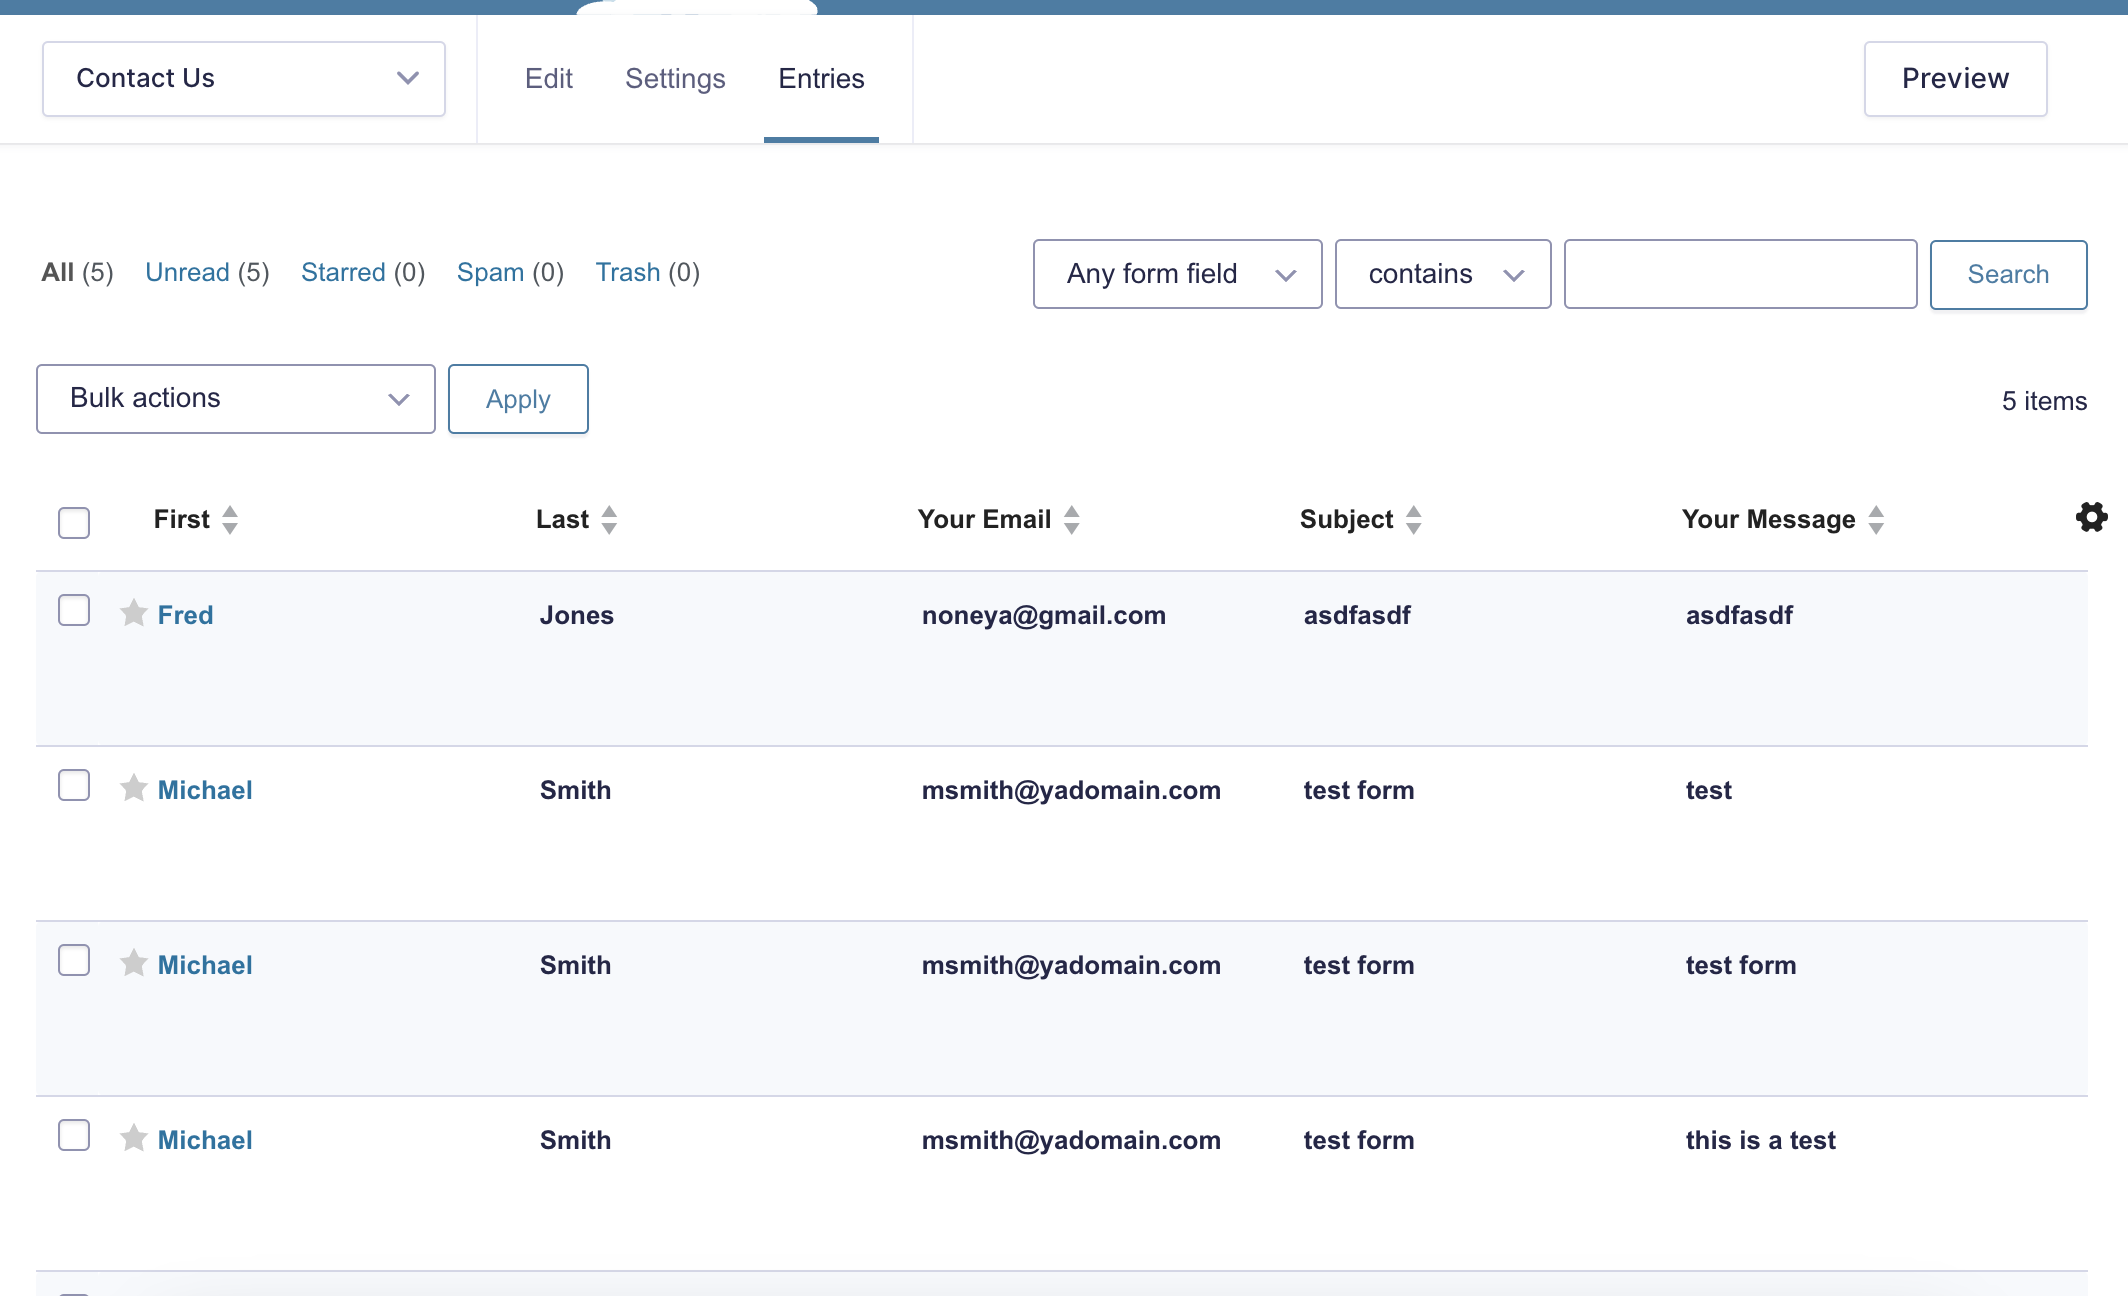
Filter Toolbar
The filter toolbar is your ally for sorting through entries. You can choose to view all entries or apply filters for unread, starred, spam, and trash entries.

Entry Actions
By hovering over an entry, you can perform quick actions as outlined below:

- Star: Use the star icon to flag important entries. You can access all starred entries for the current form by selecting the Starred link in the filter toolbar.
- Mark as Read/Unread: Marking an entry as read when you want to acknowledge it without opening the entry detail view. You can also mark the entry as unread.
- Spam: Mark the entry as spam.
- Trash: Move the entry to the Trash.
Bulk Actions
You can perform bulk actions on multiple entries at once. Available bulk actions include marking entries as read/unread, sending entries to spam or trash, and more.
- First, select the checkbox next to each entry item you want to modify.
- Then, choose the desired action from the bulk action dropdown and click Apply.
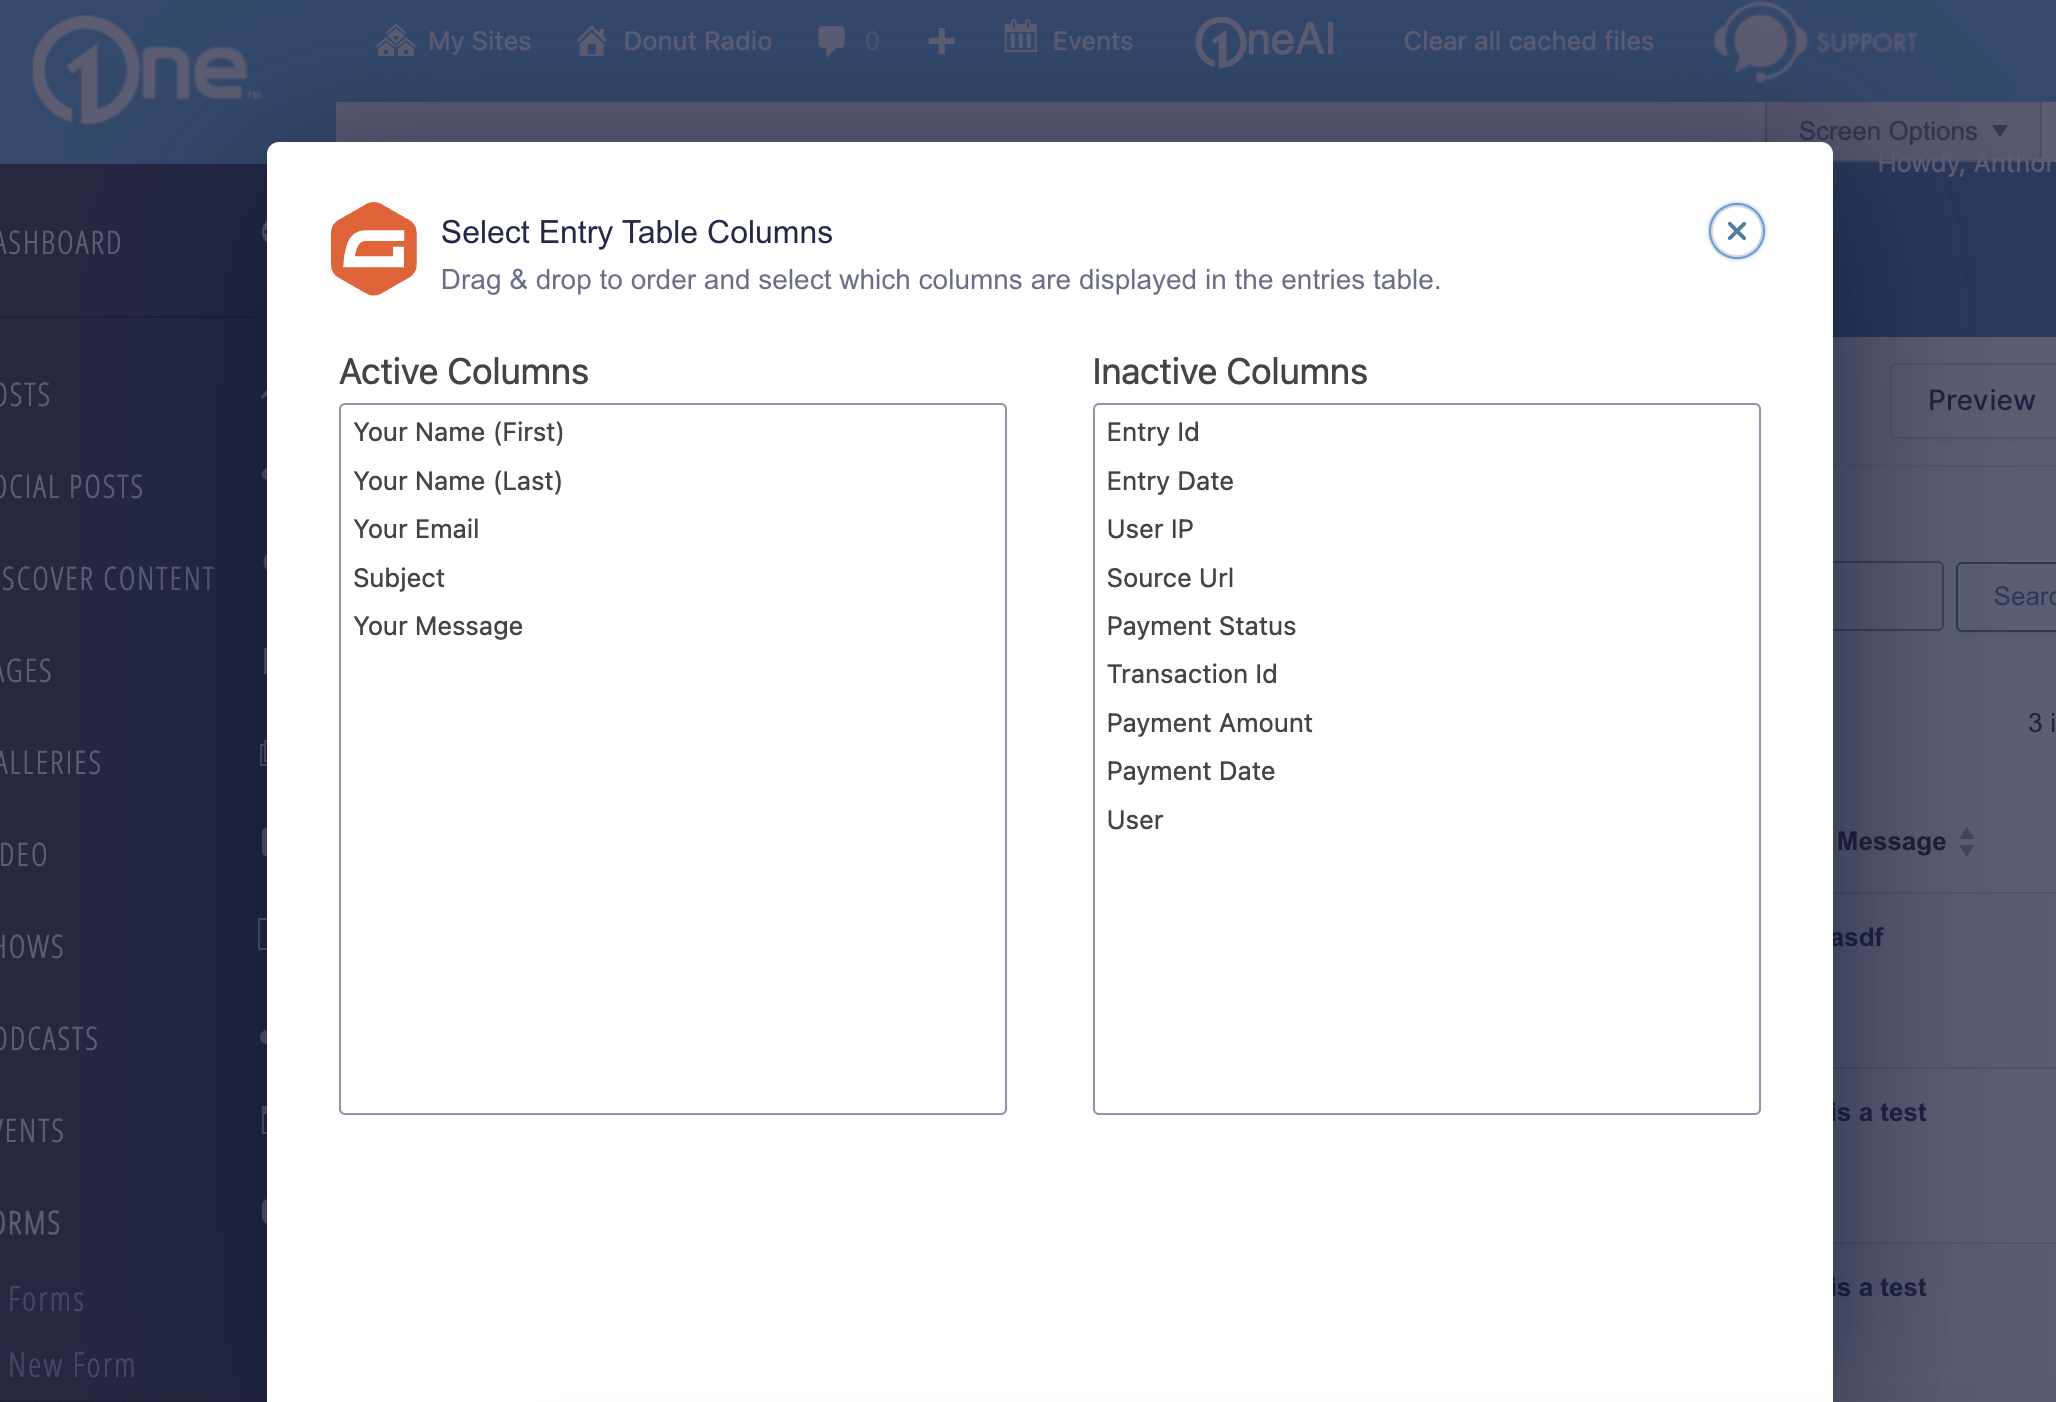
Entry Columns
One of the features of the Entries screen is the ability to pick and choose which columns should appear in the list based on available form fields.
To select the columns, click the Edit icon on the right of the entries list table header. This will display the Select Columns window.
You can drag and drop the columns you want to display from Inactive Columns to Active Columns to tailor your entries list as needed.