The cornerstone of any successful email campaign is your subscribers; without subscribers, your emails have no one to reach. OneCMS VIP Club enables you to manage your subscribers and organize them into lists, making targeting specific groups with your email campaigns easy.
VIP Club Subscribers
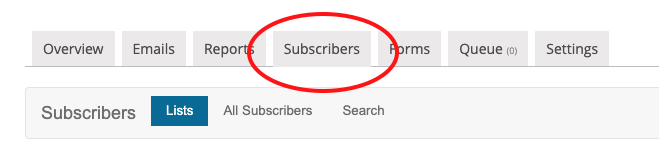
To access your subscribers, click the Subscribers tab at the top of the VIP Club screen.
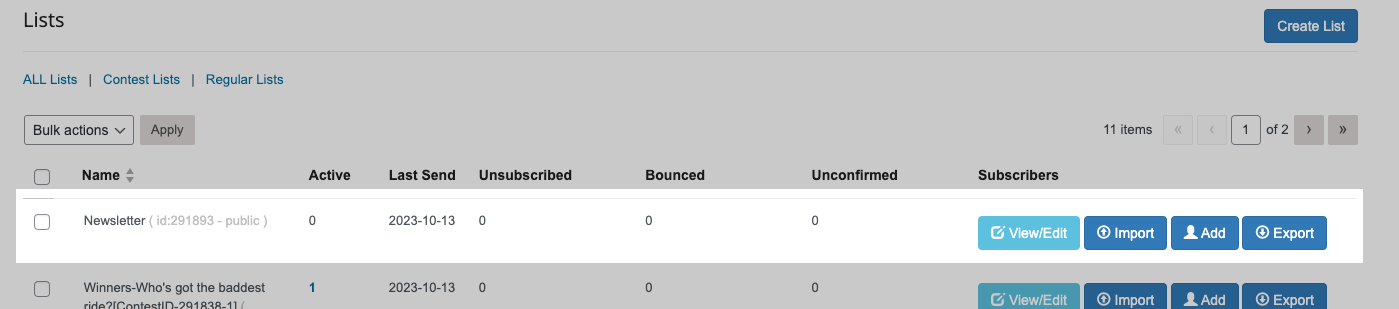
Lists
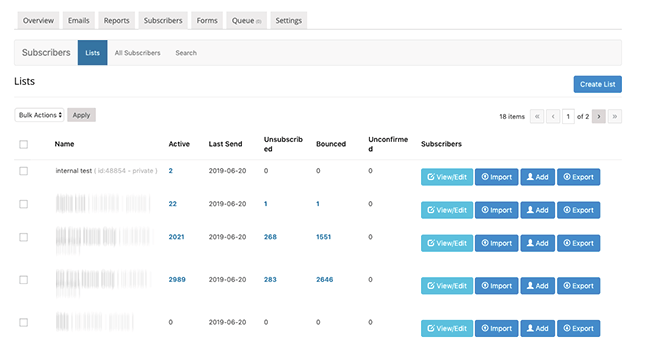
By default, you’ll land on the Lists view, which displays all the different subscriber lists you’ve created. Remember, lists serve to group subscribers for more precise email targeting.
If you’re new to this screen, you might not have any lists yet. Let’s create one now!
Creating Lists
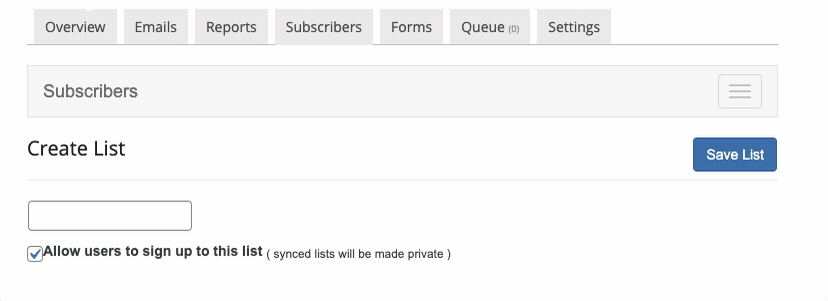
To create a new subscriber list, click the Create List button. This will take you to the list creation screen.

The only required field is assigning a name to your list. You have the freedom to name your list however you like, but keep in mind that subscribers will see this name when they manage their subscription. Our suggestion: keep it straightforward and call it something like “newsletter.”
For any list you want people to be able to subscribe to on your website, using the subscriber widget or form, be sure to select the checkbox that says Allow users to sign up for this list.
Click the Save List button to create the list.
Your new list is now created, but it’s currently empty.
There are several ways to add subscribers to a list, and we’ll explore them below.
Adding Subscribers to a List
The primary method for acquiring new subscribers is by having them sign up via a VIP Club Signup Form, which we’ll discuss in a separate tutorial. However, there are multiple ways to add subscribers to a list behind the scenes, as outlined below.
Adding from a Search Result
If you already have subscribers in your VIP Club that you wish to include in your new list, you can perform a search and add the results to your list.
Begin by clicking the Search tab at the top of the Subscribers screen.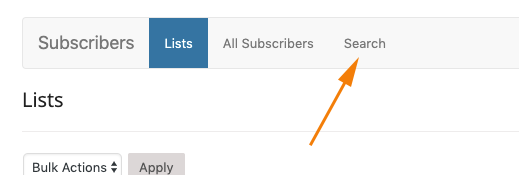
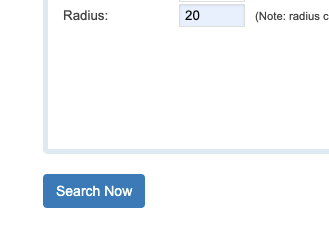
You have various filters to choose from to target a specific group of subscribers, such as gender, minimum age, or zip code. Additionally, you can select a location on the map and define a radius (in miles) to include all subscribers within that area.
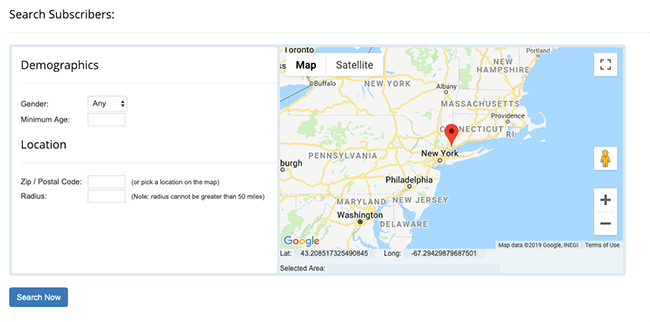
Once you’ve specified your criteria, click the Search Now button.
The search results of subscribers will appear. From here, you can select the entire list or manually choose subscribers using the checkboxes on the left side.
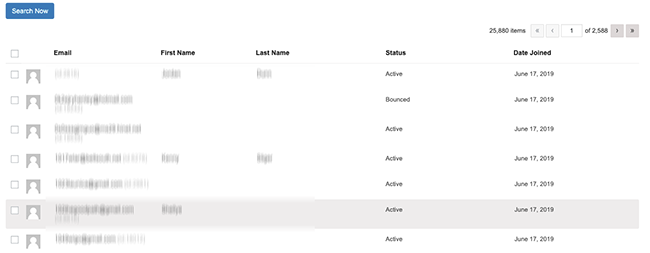
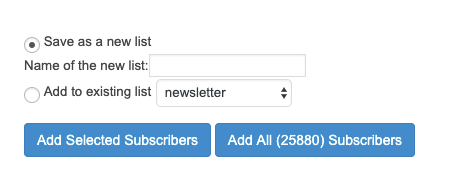
At the bottom of the screen, you have the option to create a new list based on your search results or add them to an existing list.
In this example, we’ll select the “Newsletter” list we recently created and click the Add All Subscribers button to add all the subscribers from this search.
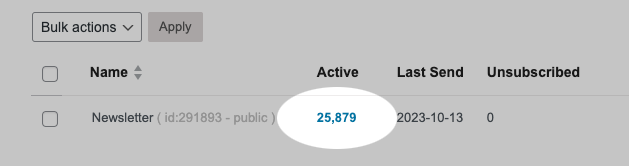
Depending on the import size, this process may take a few minutes. Once completed, you’ll see the active subscribers in your list.
Importing Subscribers from External Sources
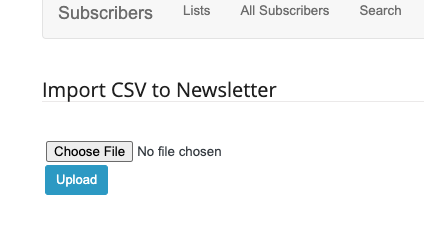
If you have subscribers from another system that you need to import, you can do so by using a CSV file. To initiate the import, click the Import button on the list you wish to add subscribers to.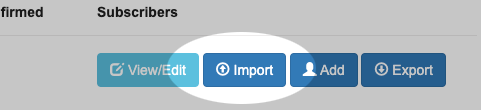
On the next screen, you can upload a CSV file of subscribers into the list.
Manually Adding Subscribers
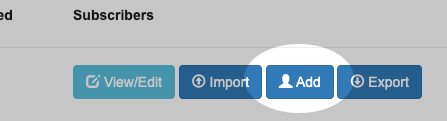
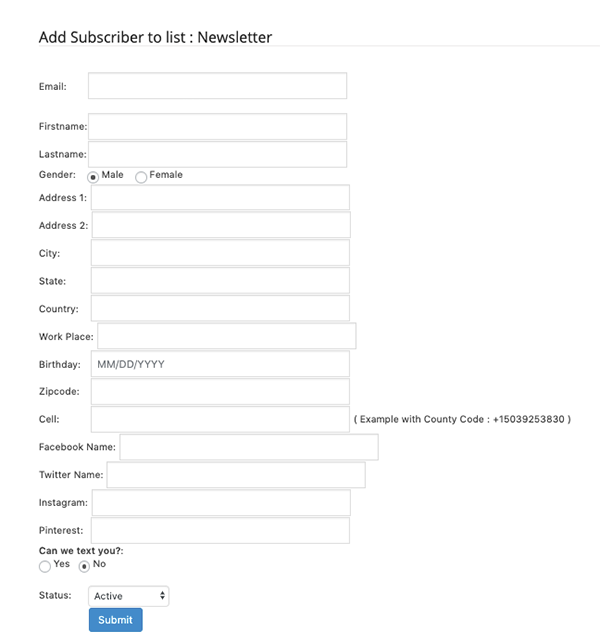
You can also manually add subscribers to your lists by clicking the Add button on a list.
From here, you can manually input a single subscriber’s details by filling out the required fields and clicking Submit.
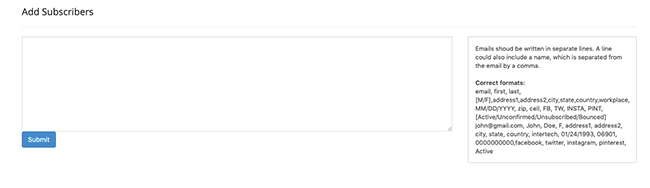
At the bottom of the page, you also have the option to manually add multiple subscribers using a comma-separated values format, which is described next to the input field.
Viewing Your Subscriber List
To view a list of all the subscribers within a specific list, click the View / Edit button for that list.

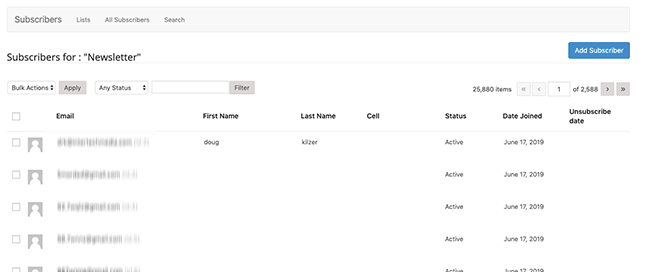
This will display all the subscribers in the selected list. From this view, you can filter the list, edit users, or remove them.
Exporting Lists
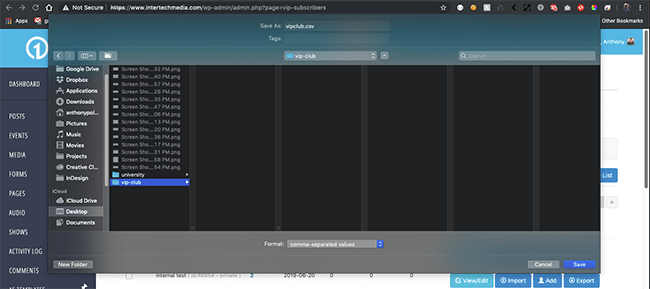
If you need to use your lists in other applications, you can export them as a CSV file. Click the Export button on a subscriber list.
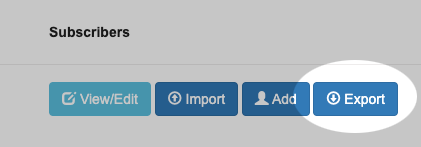 This action generates a CSV file containing your subscribers that you can download.